The Ultimate Guide to Customizing Your Backpack for Creative Minds
|
|
Time to read 5 min
|
|
Time to read 5 min
Ever felt like your backpack is just too plain for your vibrant personality? Trust me, we've all been there, staring at that boring, black void strapped to our backs, wishing it screamed "YOU" instead of "generic store-bought item." Well, folks, you're in luck because today, we're diving into the ultimate guide to customizing your backpack. Let's turn that bland bag into a canvas of creativity!
First things first, you need the right backpack to start this adventure. Not all backpacks are created equal, especially when it comes to customization.
When choosing a backpack, think about the material, size, and design. Leather might look cool, but it's a pain to paint on. Canvas, on the other hand, is like the blank page of a sketchbook—just begging for your creative touch.
Canvas backpacks are top-tier for customization. They're sturdy, take paint well, and can handle a bit of rough treatment. Trust me, you don't want to put hours into a masterpiece only for it to fall apart because you chose the wrong material. Once, I tried customizing a flimsy nylon bag—big mistake. The paint peeled off like a bad sunburn.
Now, let's get to the fun part—actually customizing your backpack! Here are some basic techniques to get you started.
Patches and pins are like the gateway drug to backpack customization. They're easy to apply and can be swapped out when you want a change.
You can find patches and pins at craft stores, online marketplaces like Etsy, or even make your own if you're feeling crafty. I've got a patch of a cat riding a unicorn that I picked up at a local fair—talk about conversation starters!
Attaching patches can be as simple as ironing them on, but for a more secure hold, sewing is your best bet. Pins are even easier—just poke 'em through and fasten the clasp. Just be careful not to stab yourself, or your backpack customization project might end with a trip to the ER.
Fabric paint and markers are great for those who want to get a little more artsy.
When painting on fabric, always use a fabric medium to mix with your acrylic paints. This keeps the paint flexible and less likely to crack. Start with a sketch, then gradually fill it in with color. Patience is key here. I once got overexcited and painted my backpack in one go, only to have all the colors blend into a muddy mess. Lesson learned.
Brands like Tulip and Arteza offer quality fabric paints and markers. Invest in some good brushes too—your backpack deserves better than those cheap, hair-shedding ones.
Ready to take things up a notch? Let's get into some advanced techniques.
Embroidery can add a touch of elegance and texture to your backpack.
Start with simple stitches like the backstitch, satin stitch, and French knot. There are plenty of tutorials online if you need a visual guide. Embroidery takes time, but it's incredibly satisfying. I spent a whole weekend stitching a floral pattern on my bag—my fingers hated me, but the result was worth it.
For your own designs, sketch them out first. Use a washable fabric pen to outline on the backpack. This way, you won't be left guessing where to stitch next.
Adding different materials can give your backpack a unique, textured look.
Sewing fabric or leather onto your backpack requires a sturdy needle and some patience. Leather, especially, can be tough to work with. I once tried sewing on a leather pocket, only to end up with a bent needle and a few choice words. But hey, the pocket looks great now!
Heat transfer vinyl (HTV) is perfect for creating clean, crisp designs.
After all that hard work, you want your backpack to last, right?
For painted backpacks, avoid harsh detergents. A gentle hand wash usually does the trick. For embroidered ones, be extra gentle to avoid fraying. If you must use a washing machine, put the backpack in a pillowcase to protect it.
Check your patches and pins regularly. Sew down any loose patches and secure wobbly pins. I've lost a few favorite pins because I got lazy with this—don't be like me!
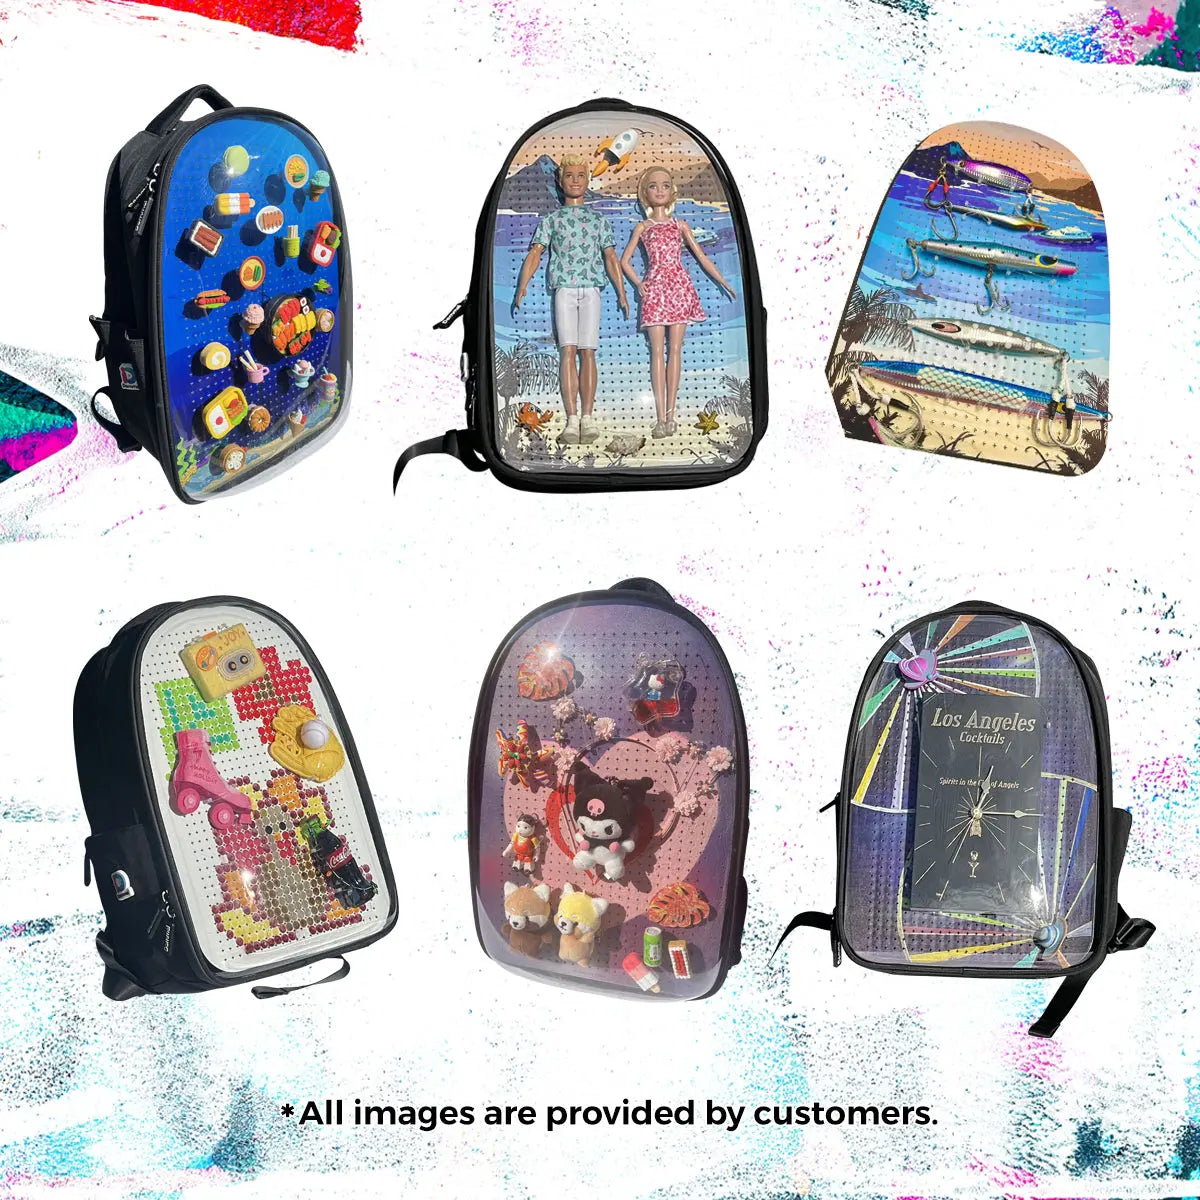
Need some inspiration? Here are some unique ideas and current trends.
Check out Instagram and Pinterest for some jaw-dropping customized backpacks. From intricate designs to bold statements, there's no shortage of inspiration.
Eco-friendly customizations are all the rage right now. Think recycled patches and organic fabrics. Minimalist designs are also trending—sometimes, less is more. I went through a phase where I added everything but the kitchen sink to my backpack. It looked like a craft store explosion. Now, I appreciate a more refined approach.
Hearing from DIY influencers can be incredibly motivating. Take it from Jane Doe, a DIY guru on Instagram, who says, "Your backpack is your canvas. Don’t be afraid to make mistakes—they often lead to the most unique creations."
To recap, customizing your backpack is a fantastic way to showcase your personality and creativity. From choosing the right materials to mastering both basic and advanced techniques, there’s no limit to what you can achieve. So, grab your supplies and get to work—your unique backpack is waiting to be created!
Remember, the most important part is to have fun and let your imagination run wild. And once you're done, don't forget to show off your masterpiece on social media. Who knows, you might inspire someone else to start their own customization journey.
Check out this video for more tips and inspiration: DIY Backpack Customization Ideas
Popular Questions:
1. Can I customize a waterproof backpack? Yes, you can! Use waterproof fabric markers, vinyl patches, or heat transfer vinyl designed for waterproof materials.
2. How do I keep the paint from cracking on my backpack? Mix a fabric medium with your acrylic paint to keep it flexible and less prone to cracking.
3. What's the best way to remove a patch if I change my mind? Carefully use a seam ripper to remove the stitching or apply heat to loosen adhesive patches.
4. Can I wash my customized backpack? Yes, but hand wash gently and avoid harsh detergents. For embroidered backpacks, use a pillowcase if machine washing.
5. What are some easy beginner customization ideas? Start with iron-on patches, enamel pins, or simple fabric paint designs. These methods are easy to apply and can be removed or changed later.
Got more questions? Leave them in the comments below and let’s get customizing!


